
Click inside the image and you can Pan around the room. If you double click you will experience the Panorama full screen.
If you want a step by step tutorial check the previous tutorial 3D Panorama-Tutorial 1 (Spherical Camera)
Position a Vray camera at the Center of your scene at around 100 cm. from the ground
choose Box Camera
activate Override FOV
Vray FOV 360°
Deactivate all the other settings

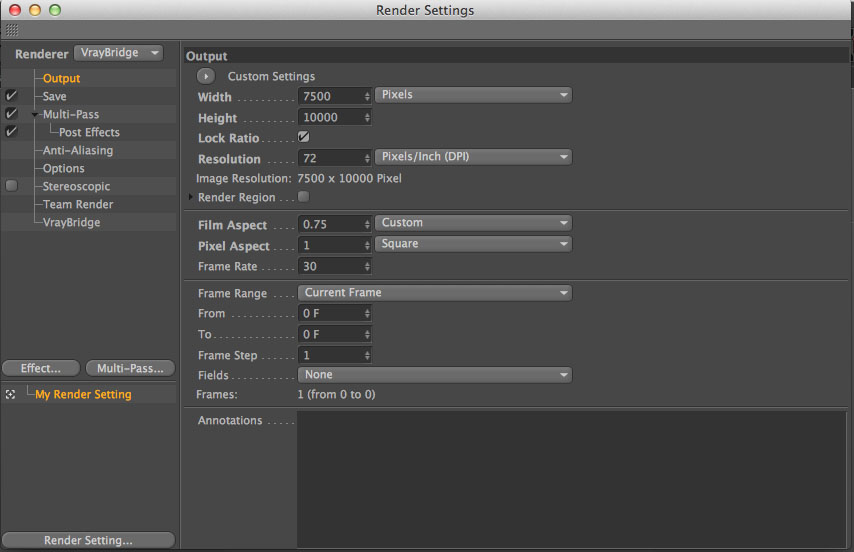
Render Settings: Output
You will need to Render the image with a ratio 3:4
Since we needed a very detailed image we used 7500 x 10000
This is the final Render image

PANO2VR SETTINGS
Open the program and first thing save the file in a folder used just for this Panorama. Load the image you just rendered by clicking on “Select Input” and then since we need to convert this kind of image to an equirectangular image click on convert input
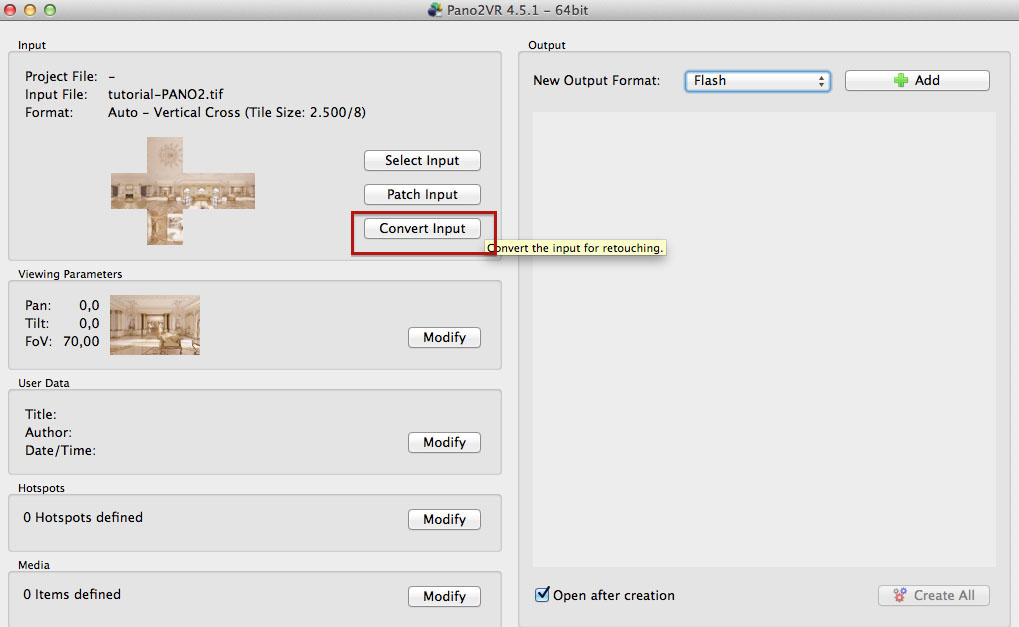
Choose type equirectangular and convert

This is the converted image

Lets change the Viewing Parameters so that we don’t get a distorted Panorama.

Change the FoV to 60 degrees or even less if you prefer. You can also change the Pan and tilt values if you want the panorama to start in a different position. In this case we rotate 90 degrees.

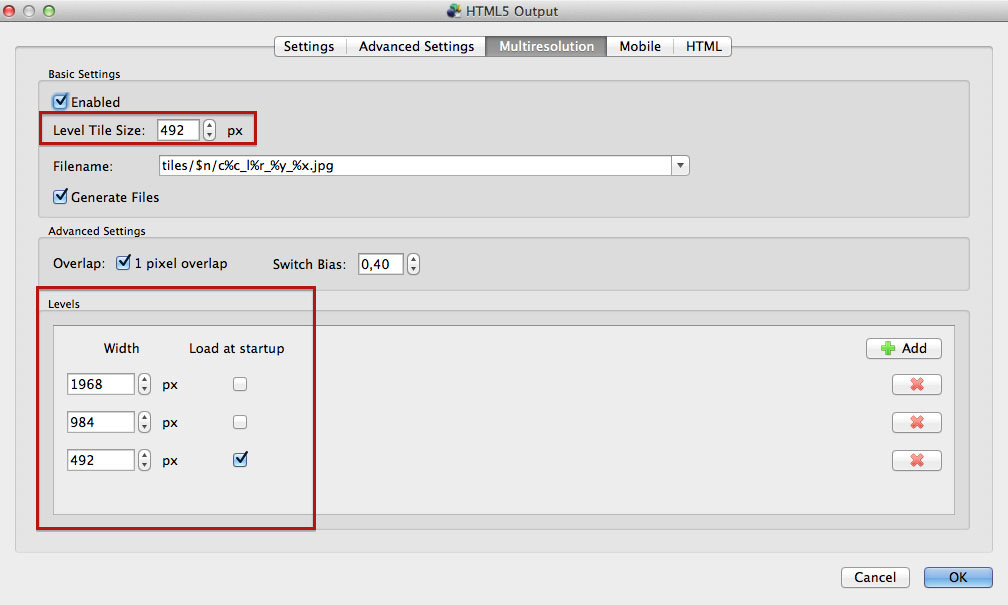
Go to Output and choose HTML5 , press ADD.

To calculate the Cube Face Size you need to estimate the value of the equirectangular width divided by 4 or Pi. Then you take this value and divide it by 2 until you get a value that is less or equal to 512. To accomodate the preview track of 1/4 you will divide this value by 4 and round to the nearest whole number. Take this final number and multiply it times 2 until you are close to the starting estimate value.
Example with our image of 7852 x 3926 pixels
7852/4= 1963
1963/2=982
982/2=491 (level tile size)
491/4=122,8 round to 123
123 x 2 x 2 x 2 x 2= 1968 (cube face size)
Levels: 1968, 984, 492 (load at startup)
Now that we have seen both cases with a Spherical Camera and with a Box Camera we can discuss the Pros and Cons. The Spherical Camera gives you a Render that has already the correct image ratio (2:1) but in some cases it takes longer time to render. In our case the difference is very relevant because we usually have Chandeliers at the center of the room and as you can see from the image anything that is at the center is larger than normal in a spherical image. This does not happen with the box camera and therefore our Render time is noticeably reduced. The box camera has an extra step because you need to convert the render in a equirectangular image, but it really just takes seconds.
As a conclusion we personally prefer the box camera, but I guess it all depends on what you need to Render. Let us know if you tried Panoramas and if you experimented something different.
Leave your questions and comments below
Leave us your comments and questions!